homeschooldrama.com blog
How to Direct a Play
Creating the sets is a fun part of the process in preparing for a production, so why not include the kids in this process. Whether you have a separate art class to spend time creating sets, a separate set design crew or you meet for a couple of days to build and paint sets, this time is great for the kids to use their creative energy to enhance the storytelling of the play.
In my twenty years of homeschooling, I have enjoyed directing numerous plays with my kids and our fellow homeschoolers and want to share what I’ve learned and continue to learn with you.
Although you don’t have to think about set design when you first start rehearsals, it is something you want to fit into your schedule to make sure it gets done. You don't want to start this process too early because you will have to store the set until the performance night, but you do want to give yourself plenty of time to get it done.
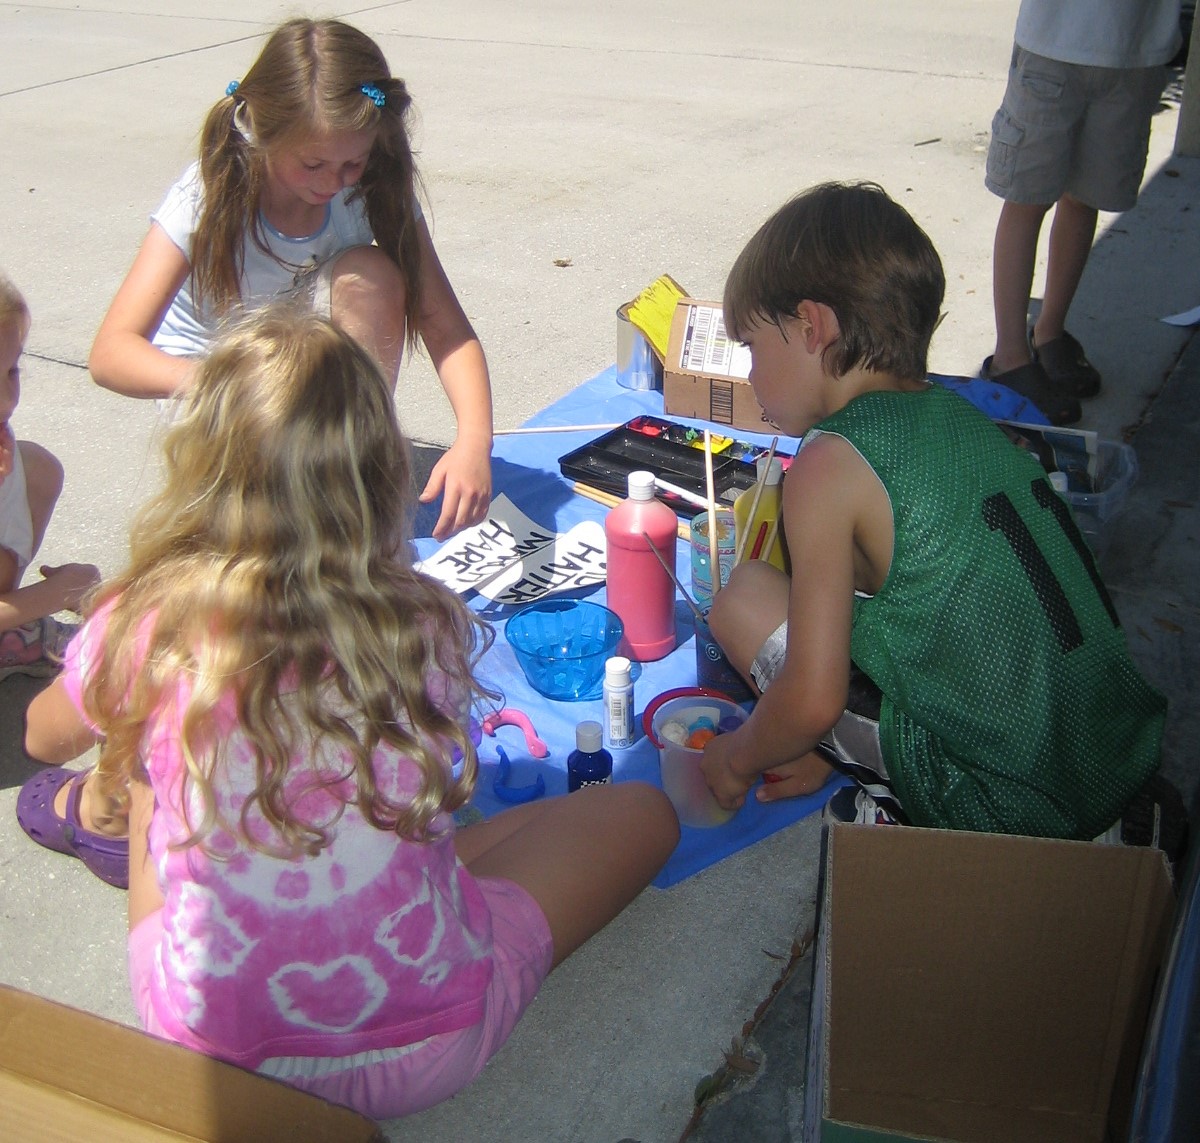
For most plays, we have taken time from rehearsals as the performance night got closer to work on set design. This usually involved helpful parents and many of the kids. We have used cardboard boxes, paint and PVC pipes for a lot of our sets to keep it affordable.
It is important to ask for help when working on designing sets. I have found there are a lot of gifted parents and kids just waiting to share their talents. I’ve had parents who have previously done plays and had backdrops they could loan me that fit nicely with our theme, as well as a parent who was an art major and could teach an art class to help the kids build the sets. I’ve also had some talented artists among the students that loved to chip in. No matter what, even if there was no experience doing set design in the past, even the youngest actor could help out.
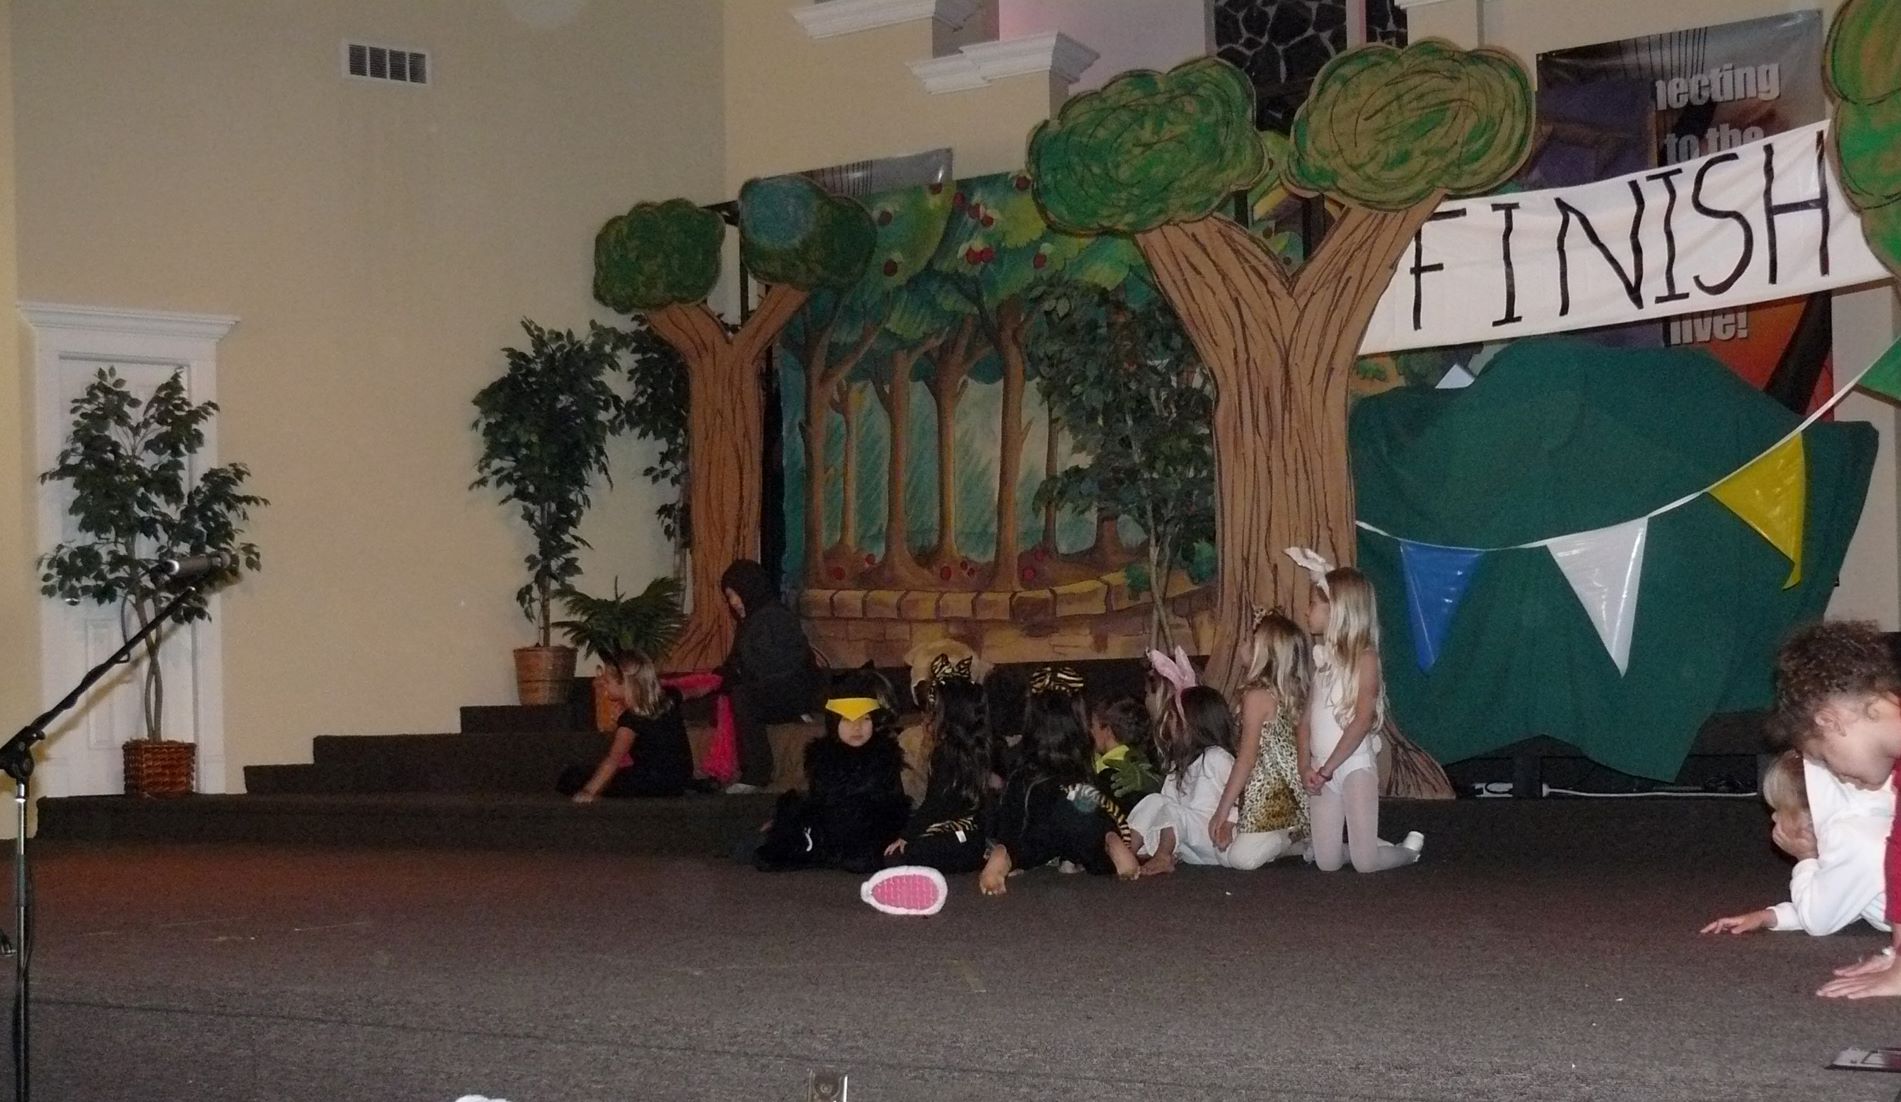
When students are involved in acting and designing sets, they understand what is needed for a scene and are motivated to get it done well. They learn to work within the parameters of the stage we have to work with and that a small stage can work just as easily as a large stage when thinking outside the box. We’ve had stages of all different shapes and sizes, along with aspects of the stage that had to be worked around like a lectern that could not be moved or a half wall with little doors that was the only way to access the back of the stage. We’ve also performed in a fellowship hall, living room and outside. Working with the stage we were given actually created a lot of fun ideas that we may not have thought of with a normal stage.
Knowing where you will be performing the play is helpful when planning your set design. While imagining the play before we start and while going through rehearsals, I often sketch different ideas for what I would like the set to look like. It usually focuses on key aspects of the scenery that are necessary to tell the story. Since we’ve never had a curtain to put down and always had a limited budget, I never had to worry about elaborate scene changes or major construction to build a set. Although some of those additions could create a beautiful set, it’s never hindered us from putting on a wonderful play.
For Alice’s Adventures in Wonderland, as the semester moved along and I continued to study the script, I would make notes of what props were needed and possible scenery. I had a brainstorming session with some moms as we considered how to make a mushroom that the caterpillar could sit on and how to make Alice look bigger as she grew in the house. It’s always fun to brainstorm, and we came up with some really creative ideas. The students were also a part of the creative thinking and came up with some unique ideas themselves that we ended up implementing. It was a team effort and something everyone could be proud of once the show was performed.
Once in a different play when we had a small stage and were trying to be efficient when changing scenes, I started thinking about how we could have one design that would work for a kitchen table, a crate for an animal, and a fence. The main part of the set was a barn, so these items helped change what was happening in each scene. I brought the idea to the art teacher, she brainstormed some ideas, and the kids built and painted the final product. It was so cool! This meant there wasn’t a lot that we had to put on and take off the stage, since this one item could be used for most of the scenes. Being constructed from cardboard also made it very light.
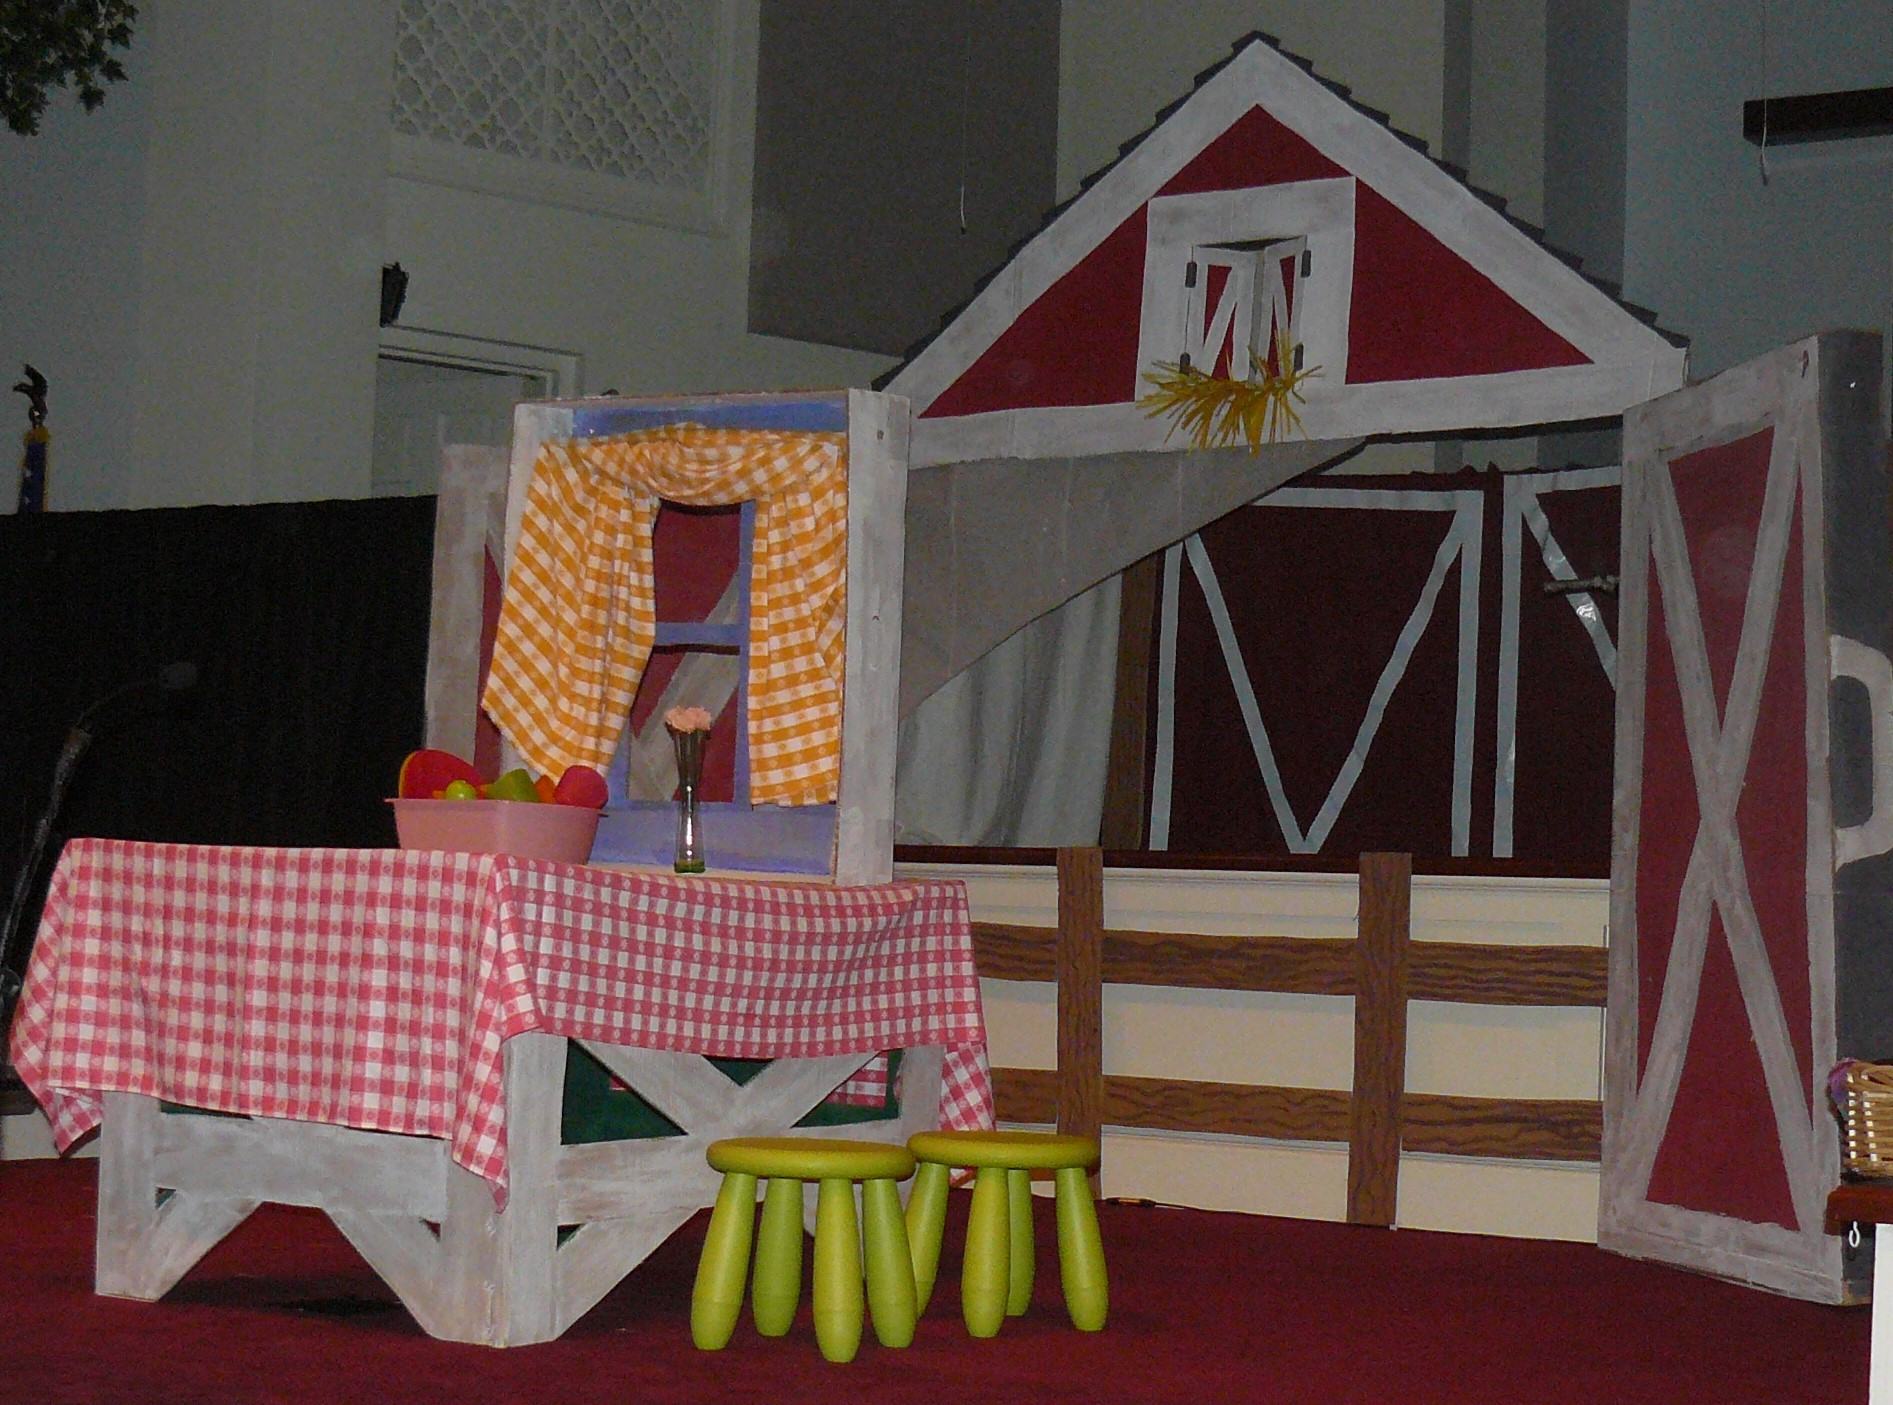
Kitchen table with barn in background
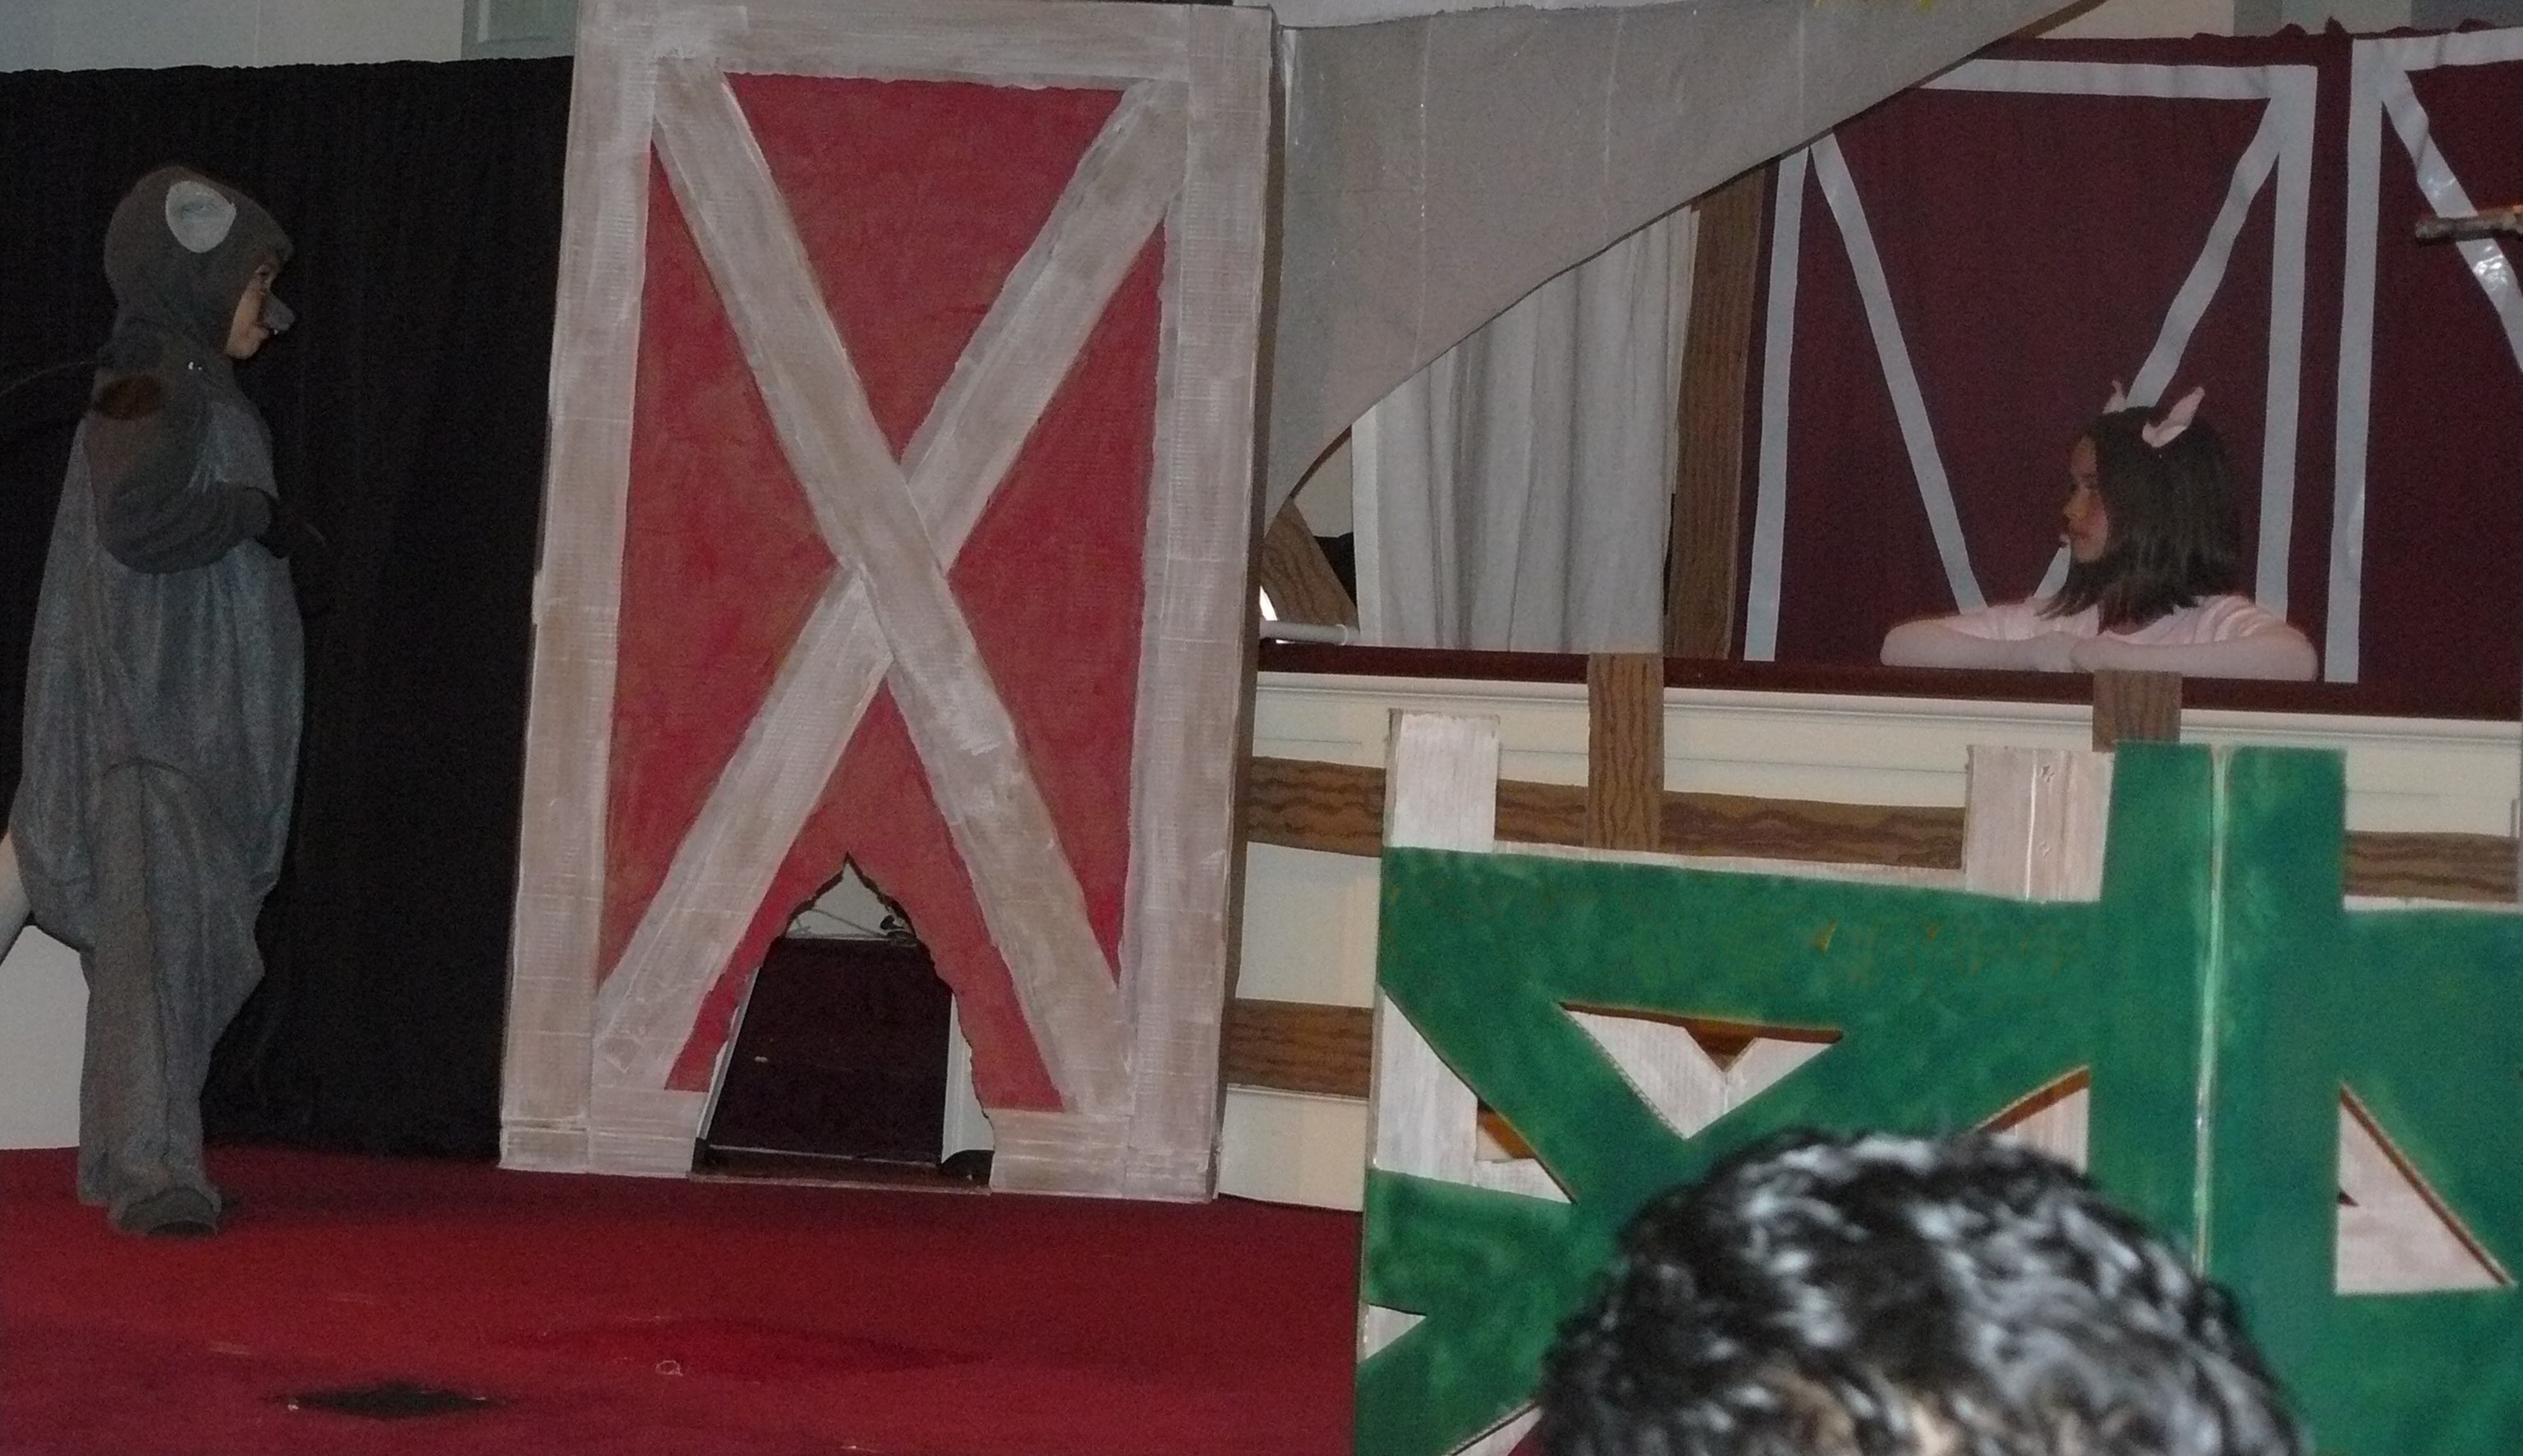
Green animal crate
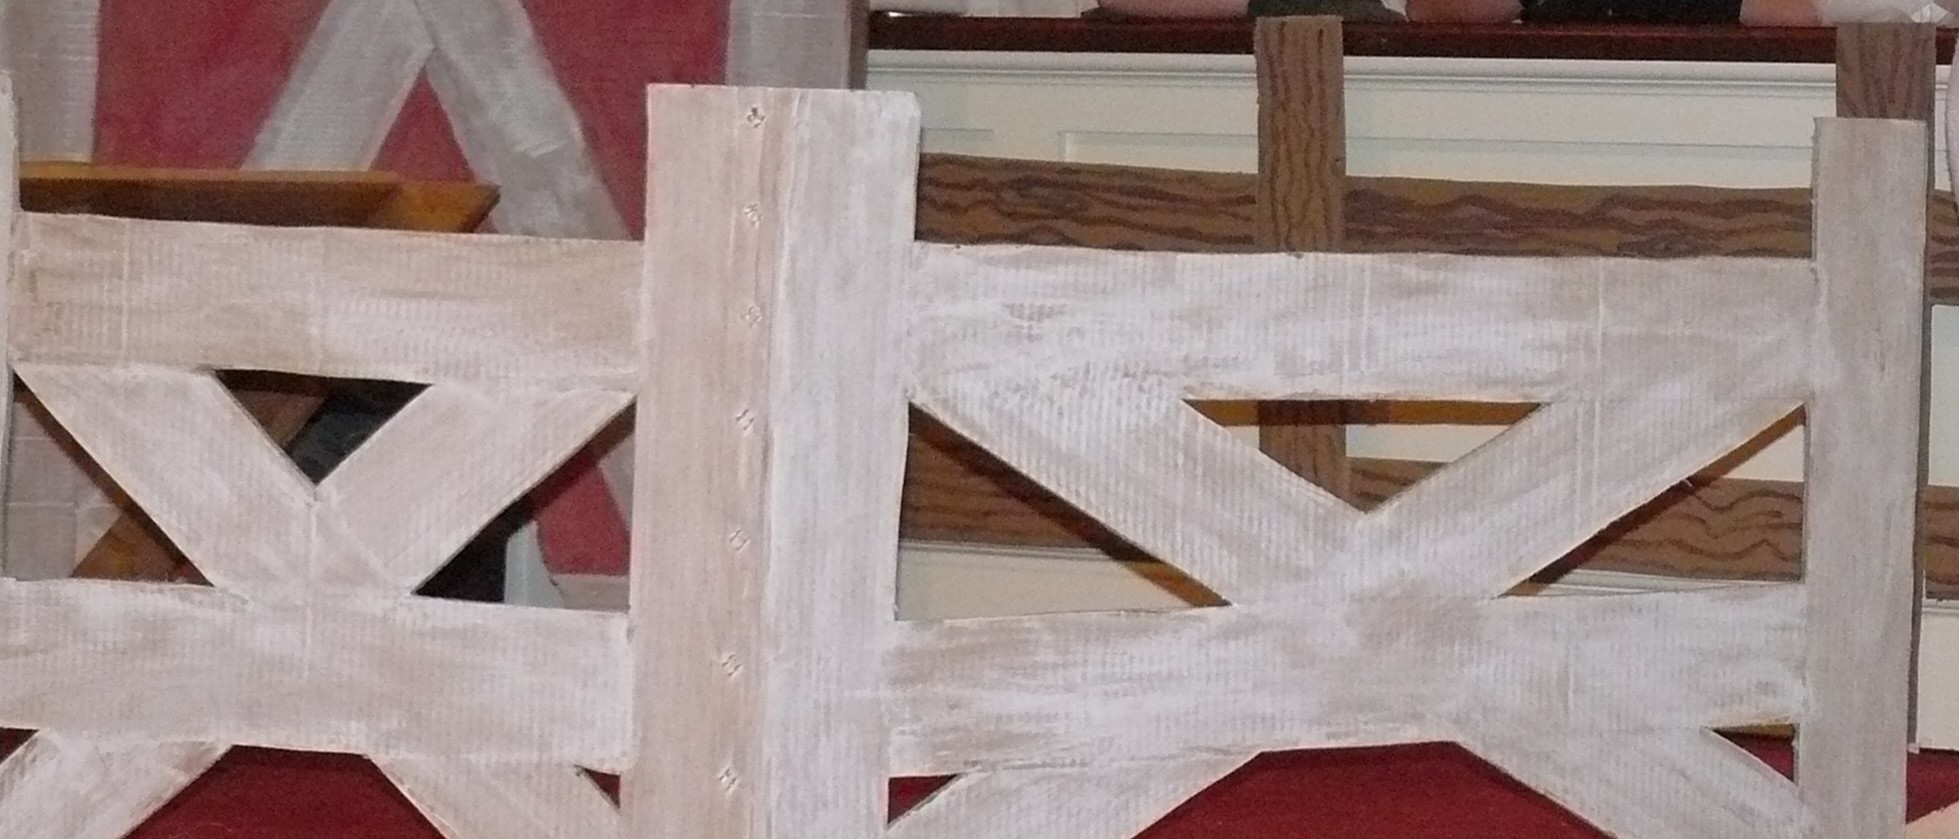
White fence
For our Thanksgiving play, A Reason to Be Thankful, the church had a pirate ship they had used for a fall festival that they let us borrow. It was really big, so we leaned it against the front of the stage and had the kids stand behind it which gave the appearance that they were on the ship. Take a look around throughout the year for items that might be helpful for an upcoming play and be sure to ask what people have that could work for the specific play you are working on. Not having money to spend sometimes is a blessing because you realize it’s not necessary to spend a lot to have a great show, and it causes you and your students to be more creative as you make the materials work that you have around you.
Cardboard is usually free if you can find some old boxes, so it’s wonderful to use when you have a tight budget or no money at all. Did you know your local copier company has big thick boxes that can work for many backdrops? You can also use refrigerator boxes or regular size boxes and tape them together.
Some examples of scenery that we have built with cardboard are bushes, trees, a candy factory, a large barn, and the table/crate/fence combo shown above. All you need is cardboard, a box cutter, packing tape if you are putting pieces together and some paint. It’s that easy.
In The Big Race play, the kids painted the bushes and trees and created the backdrop for the sports commentators using cardboard. We also borrowed a painted canvas from one of the parents and hung it using PVC pipe.
PVC pipe from your local hardware store is also very affordable and easy to work with. You can usually buy pipes in 10 ft. pieces and cut them to size with a special cutting tool for the PVC pipe. We use the ratchet-type cutter. After adding some connectors we have been able to hang canvas backdrops for more detail or a simple curtain for a backdrop or to create wings to enter and exit from. It’s an affordable way to build many structures and easy to take apart and put back together if you are traveling somewhere with it. You can also reuse these PVC pipes for future sets, so you don’t have to keep buying the materials every time you perform a play.
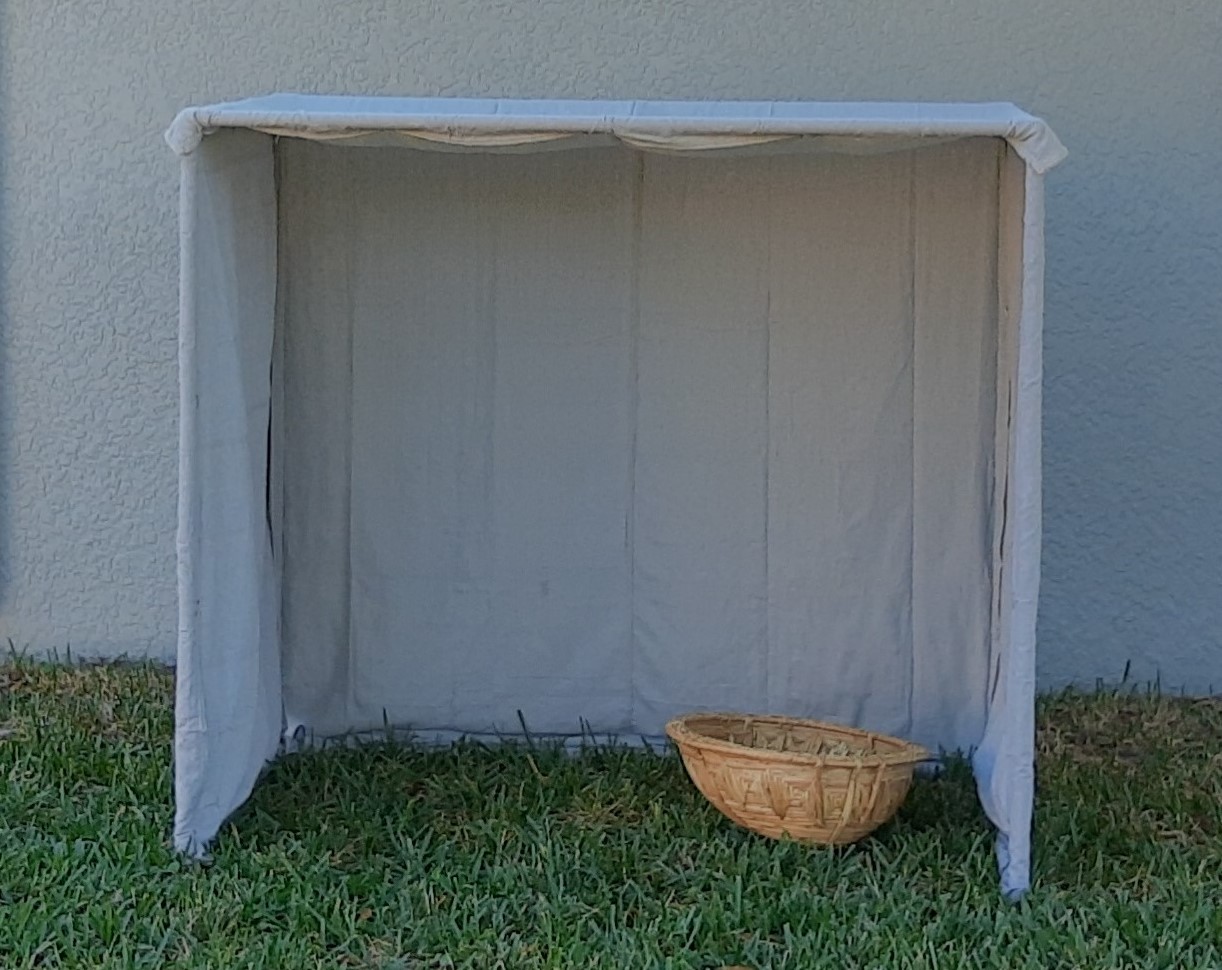
When redesigning a Nativity scene one year, I started to think about how heavy and how long the wood was that we had used in the past for the stable and how that made it challenging to store or to travel from house to house. Instead of wood and a triangular construction, I chose to use the much lighter and cheaper PVC pipes and a rectangular construction for the room that holds the manger. I added some canvas to the pipe to give it an enclosed feel and Mary, Joseph and the baby Jesus took their spots and performed their scene.
You can build sets for a play by recruiting help and putting a plan together for the set design.
If all the kids do is build sets and create props they will gain a lot of experience in theater and understand what all goes into making the story come to life beyond the characters. Without costumes, sets and props the actors have to work really hard to get the audience to imagine what they are doing. These items can really influence how the story is told.
Want to make life easier and be the first to know when the next blog is posted? Sign up below for our email newsletter to get the latest news!
If you’re looking for a play to direct or perform, check out these plays! If you want more details on how to direct a play, check out How to Direct a play - a step-by-step guide!
Thanks for joining us!
Danielle at homeschooldrama.com